Paint/Face Buttons
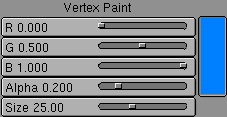
In Blender, the vertices of a Mesh can be assigned a colour, using EditButtons->"Make VertCol". Then, you can change the colour manually, as if you are painting the Mesh (start vertexPaint mode with VKEY in the 3DWindow). This ButtonsMenu has no HotKey, and can only be invoked in the ButtonsHeader with the 'brush' IconBut. The second part of these Buttons is to set drawmodes needed for the UV-Editor.

Area
In the back buffer, Blender creates an image of the painted Mesh, assigning each face a colour number. This allows the software to quickly see what faces are being painted. Then, the software calculates how much of the face the brush covers, for the degree to which paint is being applied. You can set this calculation with the option "Area".
Soft
This specifies that the extent to which the vertices lie within the brush also determine the brush's effect.
Normals
The vertex normal (helps) determine the extent of painting. This causes an effect as if painting with light.
Gamma
The number by which the clarity of the vertex colours can be changed.
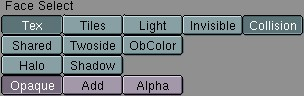
The "Face Select"-Buttons are meant for use with the UVEditor, especially usefull with the realtime engine but also to use UV-Textures for rendering. They become active if you enter the FaceSelectMode with FKEY or with the FaceSelectIcon in the 3DWindow header. These buttons display the settings for the active face when in FaceSelect mode (FKEY or the FaceSelect icon in the 3DWindow header).
When multiple faces are selected you have to use the button "Copy Drawmode" to assign the settings to all selected faces. More about the FaceSelect mode and using UV texture coordinates you can read in the UV-texturing chapter.
Tex
Faces with this attribute are rendered textured in the textured view and the realtime engine. If no texture is assigned to the face it will be rendered in a bright purple.
Tiles
Images can have a tile-mode assigned. In the ImageWindow header you can indicate how many tiles an Image will be sibdivided in. This button tells Blender to use this tilemode for the active face.
Light
The faces with this attribute are calculated with light in the realtime engine and the shaded views.
Shared
In Blender vertex colors are stored in each Face, thus allowing a different color for individual faces without having to add vertices. With this option, you can make sure that vertex colors are blended across faces if they share vertices.
ObColor
Each Object in Blender has an RGB color that can be animated with Ipo-curves. With this option the realtime engine uses this "ObColor" instead of the vertex colors.
Shadow
Faces with this option set acting as shadow in the realtime-engie. In fact the face 'drops' on the floor. So you have to make sure the normal of the face points to the Z-axis. The face has to be located in the center of the Object (or slightly above). Best effect gives a texture with an alpha channel.
Add
This option makes the face being rendered transparant. The color of the face is added to what has already being drawn, thus achieving a bright 'lightbeam'-like effect. Black areas in the texture are transparent, withe is full bright.
