The WorldButtons

The settings in this ButtonsWindow visualise the World DataBlock. It is linked to a Scene, and can therefore be reused by other Scenes. This block contains the settings for standard backgrounds ('sky'), mist effects and the built-in star generator. The ambient colour and exposure time can be set here as well.

Users
If the World block has more than one user, this button shows the total number of users. Press the button to make the World "Single User". An exact copy is then created.
Sky options.

Where the alpha in the rendering is less than 1.0, a sky colour is filled in. The alpha is then no longer usable for post-processing (unless the sky is black).
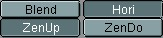
Blend
This option renders the background, e.g. a sky, with a natural progression. At the bottom of the image is the horizon colour, at the top, the colour of the zenith. The progression is not linear, but bent in the shape of a ball, depending on the lens value of the Camera.
Real
The option "Real" makes the position of the horizon real; the direction in which the camera is pointed determines whether the horizon or the zenith can be seen. This also influences the generated texture coordinates.
Paper
This option makes the "Blend" (if this is selected) or the texture coordinates completely flat, at 'viewport' level.
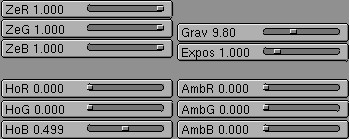
ZeR, ZeG, ZeB
The colour of the zenith. This is the point directly above or directly below an observer (on the earth!).
AmbR, AmbG, AmbB
The colour of the environmental light, the ambient. This is a rather primitive way to make the entire rendering lighter, or to change the colour temperature.
Expos
The lighting time, exposure. In fact, this causes a global strengthening or reduction in all the lamps. Use this to give the rendering more contrast.

Mist
Activates the rendering of mist. All rendered faces and halos are given an extra alpha value, based on their distance from the camera. If a 'sky' colour is specified, this is filled in behind the alpha.
Qua, Lin, Sqr
Determines the progression of the mist. Quadratic, linear or inverse quadratic (square root), respectively. "Sqr" gives a thick 'soupy' mist, as if the picture is rendered under water.
Hi
With this option, the mist becomes thinner the higher it goes. This is measured from Z = 0.0. If the value of "Hi" is set to zero, this effect is turned off.

Stars
Blender has an automatic star generator. These are standard halos that are only generated in the sky. With this option ON, stars are also drawn in the 3DWindow (as small points).
StarDist
The average distance between two stars. Do not allow this value to become too small, as this will generate an overflow.
MinDist
In reality, stars are light years apart. In the Blender universe, this distance is much smaller. To prevent stars from appearing too close to the Camera, you can set a "MinDist" value. Stars will never appear within this distance.

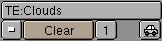
Texture name
A World has six channels with which Textures can be linked. This is only used for the sky. Each channel has its own mapping; i.e. the effect the texture has on the sky. The settings are in the buttons described below.
Mapping: coordinates input.
Each Texture has a 3D coordinate (the texture coordinate) as input. A sky has three options for this.
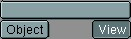
Object Name
The name of the Object that is used as a source for the texture coordinates. If the Object does not exist, the button remains empty.
Object
Each Object in Blender can be used as a source for texture coordinates. To accomplish this, an inverse transformation is used to obtain the local Object coordinate. This links the texture to the position, dimensions and rotation of the Object.
Mapping: transform coordinates.
Use these buttons to more finely adjust the buttons texture coordinate.
Users
If the Texture Block has more than one user, this button shows the total number of users. Press the button to make the Texture "Single User". An exact copy is then created.
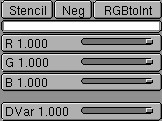
Stencil
Textures are normally executed one after the other and layed over one another. A second Texture channel can completely replace the first one. This option sets the mapping to stencil mode. No subsequent Texture can operate where this Texture is operating. Neg (TogBut) The Texture operation is reversed.