The standard TextureButtons

This group of buttons determines the type of user from which the Texture must be displayed. Blender automatically selects the correct settings if the TextureButtons are invoked from the MaterialButtons, LampButtons or WorldButtons.
Lamp
The Texture of the Lamp is displayed.
This group of buttons shows the channels. In this example, we see that of the eight available channels for the Material, only the first is linked to a Texture.

The program includes nine types of textures. These are described in detail later in this manual.


Bright
The 'brightness' of the colour or intensity of a texture. In fact, a fixed number is added or subtracted.
Colorband
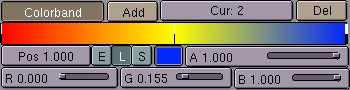
Use this option to create a smooth colour progression. Intensity textures are thus changed into an RGB texture. The use of Colorband with a sharp transistion can cause aliasing.
Pos:
The position of the active colour. Values range from 0.0 to 1.0. This can also be entered using LeftMouse (hold-move) in the Colorband.
Image texture
The Image texture is the most frequently used and most advanced of Blender's textures. The standard bump-mapping and perspective-corrected MipMapping, filtering and anti-aliasing built into the program guarantee outstanding image quality (set the DisplayButtons->OSA ON for this). Because pictures are two-dimensionaal, you must specify in the mapping buttons how the 3D texture coordinate is converted to 2D; mapping is a part of the MaterialButtons.

InterPol
This option interpolates the pixels of an Image. This becomes visible when you enlarge the picture. Turn this option OFF to keep the pixels visible - they are correctly anti-aliased. This last feature is useful for regular patterns, such as lines and tiles; they remain 'sharp' even when enlarged considerably.
MipMap
Generates a series of pictures, each half the size of the former one. This optimises the filtering process. When this option is OFF, you generally get a sharper image, but this can significantly increase calculation time if the filter dimension becomes large.
Fields
Video frames consist of two different images (fields) that are merged by horizontal line. This option makes it possible to work with field images. It ensures that when 'Fields' are rendered (DisplayButtons->Field) the correct field of the Image is used in the correct field of the rendering. MipMapping cannot be combined with "Fields".
Movie
Movie files (AVIs supported by Blender, SGI-movies) and 'anim5' files can also be used for an Image. To do this, set the "Frames" NumBut to the total number of frames.
Anti
Graphic images such as cartoons and pictures that consist of only a few colours with a large surface filling can be anti-aliased as a built in pre-process.
St Field
Normally, the first field in a video frame begins on the first line. Some framegrabbers do this differently!


Load Image
The (largest) adjacent window becomes an ImageSelectWindow. Specify here what file must be read to become an Image.
ImageBrowse
You can select a previously created Image from the list provided. Image blocks can be reused without taking up extra memory.
Users
Indicates the number of users for the Image. The "Single User" option cannot be activated here. It has no significance for Images.
Pack
Indicates the packing of the image. Pressed (grey) means the image is packed into the Blend-file. Klicking on the Button packs or unpacks the image. If a unpack option is triggered the unpack-menu pops up.

Reload
Force the Image file to be read again.
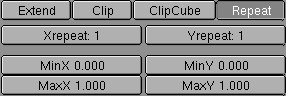
The following options determine what happens if the texture coordinate falls outside the Image.
Clip
Outside the Image, an alpha value of 0.0 is returned. This allows you to 'paste' a small logo on a large object.
ClipCube
The same as "Clip", but now the 'Z' coordinate is calculated as well. Outside a cube-shaped area around the Image, an alpha value of 0.0 is returned.
MinX, MinY, MaxX, MaxY
Use these to specify a cropping, it appears that the Image actually becomes larger or smaller.
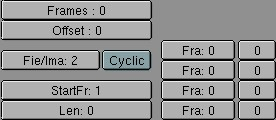
Frames
This activates the animation option; another image file (in the same Image block) will be read per rendered frame. Blender tries to find the other files by changing a number in the file name. Only the rightmost digit is interpreted for this. For example: 01.ima.099.tga + 1 becomes 01.ima.100.tga. The value of "Frames" indicates the total number of files to be used. If the option "Movie" is ON, this value must also be set. Now, however, a frame is continually taken from the same file.
Fie/Ima
The number of fields per rendered frame. If no fields are rendered, even numbers must be entered here. (2 fields = 1 frame).
Len
This button determines the length of the animation. By assigning "Len" a higher value than "Frames", you can create a still at the end of the animation. The "Fra:"-buttons allow you to create a simple montage within an animation Image. The left button, "Fra" indicates the frame number, the right-hand button indicates how long the frame must be displayed.
Environment Maps
Blender allows three types of environment maps:
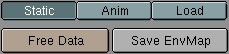
Dynamic
The map is calculated each time a rendering takes place. This means moving Objects are displayed correctly in mirroring surfaces.
Load
When saved as an image file, environment maps can be loaded from disk. This option allows the fastest rendering with environment maps.
Free Data
This action releases all images associated with the environment map. This is how you force a recalculation when using a Static map.
Save EnvMap
You can save an environment map as an image file, in the format indicated in the DisplayButtons (F10).
These buttons are drawn when the environment map type is "Load". The environment map image then is a regular Image block in the Blender structure.
Load Image
The (largest) adjacent window becomes an ImageSelectWindow. Specify here what file to read in as environment map.
ImageBrowse
You can select a previously loaded map from the list provided. EnvMap Images can be reused without taking up extra memory.
File Name
Enter an image file name here, to load as an environment map. Users (But) Indicates the number of users for the Image.Reload (But) Force the Image file to be read again.

Ob:
Fill in the name of an Object that defines the center and rotation of the environment map. This can be any Object in the current Scene.
Plugin texture
Plugins are pieces of compiled C-code which can be loaded by runtime, to extend a programms features. After choosing "Load Plugin" you get a FileWindow which lets you choose a plugin. The plugins are plattform specific, so be sure to load a plugin for your operating system.
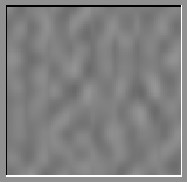
Clouds texture
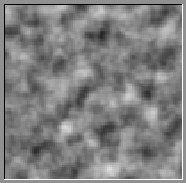
"Clouds" is a proceduraltexture. This means that each 3D coordinate can be translated directly to a colour or a value. In this case, a three-dimensional table with pseudo random values is used, from which a fluent interpolation value can be calculated with each 3D coordinate (thanks to Ken Perlin for his masterful article "An Image Synthesizer", from the SIGGRAPH proceedings 1985). This calculation method is also called ~(Perlin) Noise.

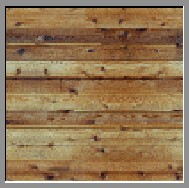
Wood texture
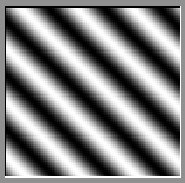
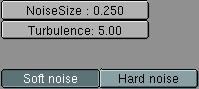
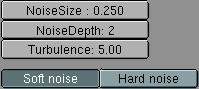
"Wood" is also a proceduraltexture. In this case, bands are generated based on a sine formula. You can also add a degree of turbulence with the Noise formula. It returns an Intensity value only.

Marble texture
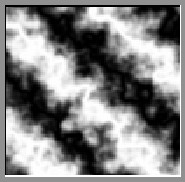
"Marble" is also a proceduraltexture. In this case, bands are generated based on a sine formula and Noise turbulence. It returns an Intensity value only.

Magic texture
"Magic" is a procedural texture. The RGB components are generated independently with a sine formula.