The AnimButtons
This ButtonsWindow visualises settings associated with animations, most of which are part of the Object DataBlock. It can also be used to create Effects: like the 'Build'- and the 'Particles'-Effect. Hotkey: F7.

The typical 'browse' MenuBut is missing here. Link Objects to other Scenes with the LinkMenu (CTRL+L).
OB:
Give the Object block a new and unique name. The Object is inserted again, sorted alphabetically.
Users
If the Object block has multiple users, this button shows the total number of users. Press the button to make the Object "Single User". An exact copy is then created (exlusive the Object block).
Tracking buttons
In Blender, Objects can be assigned a rotation constraint:
Objects that always point in the direction of other Objects: CTRL+T, or "Make Track".
Objects as Children of a Curve path, where the curve determines the rotation ("Follow" button).
Particles can give rotations to Objects (see AnimButtons, Effects). Because Objects have a rotation of their own, it is advisable to first erase this using ALT+R. If the Object is a Child, then erase the "Parent Inverse" as well using ALT+P.
Use these buttons to indicate how tracking must work:
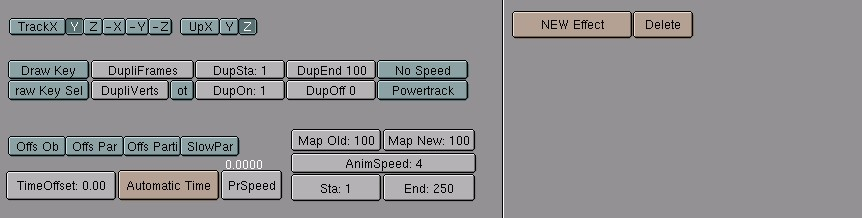
TrackX, Y, Z, -X, -Y, -Z
Specifies the direction axis; the axis that, for example, must point to the other Object.
UpX, UpY, UpZ
Specify what axis must point 'up', in the direction of the (global) positive Z axis. If the "Track" axis is the same as the "Up" axis, this is turned off.
PowerTrack

This option completely switches off the Object's own rotation and that of its Parents. Only for Objects that 'track' to another Object.
DrawKey

If Objects have an Object Ipo, they can be drawn in the 3Dwindow as keypositions. Key positions are drawn with this option ON and the IpoKeys ON (in the IpoHeader). Hotkey: KKEY.
Duplicators

Blender can automatically generate Objects without actually creating them. To do this, an animation system must be created first. A 'virtual' copy of the Object will then be placed on every frame specified. It is also possible to have a virtual copy placed on each vertex (or particle). This can be used as a modeling tool as well. To do this, select the duplicated Objects and press CTRL-SHIFT+A ("Make Dupli's Real").
DupliFrames
No matter how the Object moves, with its own Object Ipos or on a Curve path, a copy of the Object is made for every frame from "DupSta" to "DupEnd". The "DupliFrames" system is built for the specified frame interval.
DupOn, DupOff
Empty positions can be specified with the option "DupliFrames". For example: "DupOn" on '2', "DupOff" on '8' sets two copies on every 10 frames. The duplicated Objects move over the animation system like a sort of train.
Slurph

This option is only available if there are VertexKeys. The "Slurph" value specifies a fixed delay for the interpolation of Keys pervertex. The first vertex comes first, the last vertex has a delay of "Slurph" frames. This effect makes quite special and realistic Key framing possible.
Watch the sequence of vertices carefully with Meshes. The sequence can be sorted with the commands EditButtons->Xsort and EditButons->Hash. Naturally, it is important that this occurs before the VertexKeys are created, because otherwise quite unpredictable things can occur (however, it can be nice for Halos).
Relative Keys
This button toggles between using standard vertex keyframing and the use of relative vertex keys. Relative vertex keys allowing mix, add or subtract multiple vertex key positions independently. Best suited for facial expression animations.
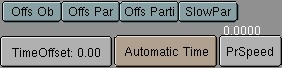
SlowPar
The value of "TimeOffset" is used to create a 'delay' in the Parent relationship. This delay is cumulative and depends on the previous frame. When rendering animations, the complete sequence must always be rendered, starting with the first frame.
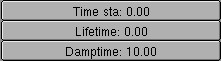
TimeOffset
Depending on the previously mentioned pre-sets, the animation is shifted a number of frames. This does not work for VertexKeys.
Automatic Time
This generates automatic "TimeOffset" values for all selected Objects. The start value is the value of the "TimeOffset" button. A requestor pops up and asks for the size of the interval. Blender looks at the Object's screen coordinates in the nearest 3DWindow and calculates the offset values from left to right.
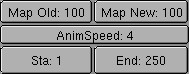
Map Old, Map New
This button can be used to modify the internal time calculation. "Map Old" gives the previous value in frames; "Map New" specifies the number of frames that must be rendered. Only the mutual relations between these values are important. Use this only to speed up or slow down the entire animation system. The absolute value 'frame' now becomes relative, which can be quite confusing if the animation must still be modified.
AnimSpeed
The maximum speed of the real-time animation playback, expressed in hundredths of a second.
Sta, End
The start and end frame of an animation to be rendered or played real-time.

These buttons are only displayed if the active Object is a Curve.
CurvePath
Specifies that the Curve becomes a path. Children of this Curve now move over the curve. All Curves can become a path, but a 5th order Nurbs curve works best. It has no problems with movement and rotation discontinuity.
CurveFollow
The Curve path passes a rotation to the Child Objects. The 'Tracking' buttons determine which axis the path follows. In EditMode, horizontal lines are also drawn for a 3D curve. This determines the tilt, which is an extra axis rotation of the Child Objects. The tilt can be changed using the TKEY. Curve paths cannot give uniform perpendicular (aligned with the local Z axis) rotations. In that case, the 'up' axis cannot be determined.
PrintLen
The length of the path is printed in Blender units.
These buttons are displayed if an IpoWindow is present in the same Screen.
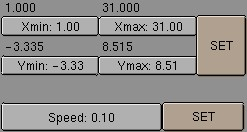
Xmin, Xmax, Ymin, Ymax
The numbers above these buttons specify the boundbox of all the visible curves in the IpoWindow. Use the buttons to enter a new value.

Speed
In certain cases, the exact speed of a translation caused by Object Ipos must be determined. Proceed as follows to do this:
In the IpoWindow, make only the LocX, LoxY, LocZ curves visible.
Set the IpoKey option ON (KKEY in the IpoWindow).
Select the keys that must be assigned a particular speed.
Only keys that already have a speed and direction can be changed. If the speed is 0.0, nothing happens.
Press the "Set" Button.
Anim Effects: Build
Three effects are currently built in: "Build", "Particles" and "Wave". Effects are a fixed part of the Object; they cannot have any links or multiple users.

Build
Select an effect. The Build Effect works on Meshes, which are built up face by face over time. It also works on the vertices in Halo Meshes. The sequence in which this happens can be specified in the 3DWindow with CTRL+F: "Sort Faces" (not in EditMode). The faces of the active Mesh Object are sorted. The current face in the 3DWindow is taken as the starting point. The leftmost face first, the rightmost face last.
Anim Effects: Particles

Particles are halos (or Objects if the option "DupliVerts" is ON) that are generated more or less according to laws of physics. Use Particles for smoke, fire, explosions, a fountain, fireworks or a school of fish! With the Static option it is also possible to make fur or even plants.
A Particle system is pre-calculated as a pre-process (this can take some time). They can then be viewed in the 3DWindow in real time. Particles are a full-fledged part of Blender's animation system. They can also controlled by Lattices. Only Meshes can have Particles.
Recalc All
Recalc the particle-system after changing the animation of the emitter mesh. This updates the particle-system.
Static
Making static particles. Particles now don't animate or move anymore, they follow the Object's transformation. Static particles are generated one at each 'frame' for the entire 'Life' value. Use the "step" option to control this; step=2 means a particle at every two frames.

Tot
The total number of Particles. Particles require quite a bit of memory (not in the file!) and rendering time, so specify this value carefully.
Keys
Not all Particle locations are calculated and remembered for each frame for the entire particle system. This is only done for a fixed number of key positions between which interpolations are performed. A larger number of "Keys" gives a more fluid, detailed movement. This makes significant demands on the memory and time required to calculate the system.

CurMul
Particles can 'multiply themselves' at the end of their lives. For each generation, certain particle settings are unique. This button determines which generation is displayed.
Mult
This determiness whether the particles multiply themselves. A value of 0.0 switches this off. A value of 1.0 means that each Particle multiplies itself. The particle system itself ensures that the total number of Particles is limited to the "Tot" value.

Face
With this option particles are not only emited from vertices, but also from the faces of the mesh.
Bspline
The Particles are interpolated from the keys using a B-spline formula. This give a much more fluid progression, but the particles no longer pass exactly through the key positions.
Vect
This gives particles a rotation direction. This can be seen in the Halo rendering. Particles that duplicate Objects now also give a rotation to these Objects. VectSize (TogBut) The extent to which the speed of the "Vect" Particle works on the dimensions of the Halo.

Norm
The extent to which the vertex normal of the Mesh gives the Particle a starting speed. If the Mesh has no faces (and thus no vertex normals) the normalised local vertex coordinate is used as the starting speed.
Ob
The Extent to which the speed of the Object gives the Particle a starting speed. This makes a rotating cube become a sort of 'sprinkler'.
Tex
The extent to which the Texture gives the Particle a starting speed. For this, only the last Texture of the Material is used, in channel number 8.

Force X, Y, Z
A standard, continually present force. This can simulate the effect of gravity or wind.
Texture X, Y, Z
A standard force that works on a Particle, determined by the texture. Textures can have an effect on the movement of Particles. The 3D coordinate of the Particle is passed to the texture per Particle key.
Int
The Intensity that is passed back from the texture is used as a factor for the standard texture force (previous three buttons).
RGB
The colour of the texture has a direct effect on the speed of the Particle: Red on the X, Green on the Y and Blue on the Z component of the speed.
Grad
The gradient of the texture is calculated. This is the mathematical derivitive. Four samples of the texture are combined to produce a speed vector. With procedural textures, such as Clouds, this method gives a very beautiful, turbulent effect. Set the number of "Keys" as high as possible to see the sometimes rather subtle twisting.
Anim Effects: Wave

The Wave Effect adds a animated Wave to a Mesh. It is not limited to flat objects but can also be used to make a sphere 'wobble'.
The Wave Effect can be accessed from the AnimButtons F7 while the mesh is active. Choose 'NEW Effect' and change it with the MenuButton to 'Wave'.