The IpoWindow

IpoHeader

WindowType
As with every window header, the first button enables you to set the window type. Full Window (IconTog) Maximise the window or return it to the previous window display size; return to the old screen setting (CTRL-UPARROW).
IpoKeys

This is a drawing mode for the animation curves in the IpoWindow (the IpoCurves). Yellow vertical lines are drawn through all the vertices of the curves. Vertices of different curves at the same location in 'time' are joined together and can easily be selected, moved, copied or deleted. This method adds the ease of traditional key framing to the animation curve system. For Object-Ipos, these IpoKeys can also be drawn and transformed in the 3DWindow. Changes in the 3D position are processed in the IpoCurves immediately. #->$11
Ipo Type

Depending on the active Object, the various Ipo systems can be specified with these buttons. From left to right in the image (in Blender window they are not all present at all times and not in this order).
Object Ipo
Settings, such as the location and rotation, are animated for the active Object. All Objects in Blender can have this Ipo block.
Material Ipo
Settings of the active Material are animated for the active Object. A NumBut appears as an extra feature immediately to the right when this button is selected. This button indicates the number of the active Texture channel. Eight Textures, each with its own mapping, can be assigned per Material. Thus, per Material-Ipo, 8 curves in the row OfsX, OfsY, ...Var are available.
World Ipo
Used to animate a number of settings for the WorldButtons. World too has several texture channels.
VertexKey Ipo
If the active Object has a VertexKey, the keys (Absolute or Relative) are drawn as horizontal lines. Only one IPOcurve is available to interpolate between the Absolute keys, or as many curves as Keys are allowed for Relative Keys.
Constrain Ipo
If the active Object has a constrain its influence value can ba animated via an IPO. Each constrain has its own IPO. used to display the speed-Ipo.
Speed Ipo
If the active Object is a path Curve, this button can be used to display the speed (time) IPO.
Lamp Ipo
If the active Object is a Lamp, this button can be used to animate light settings, comprehensive of textures.

Ipo Browse
Choose another Ipo from the list of available Ipos. The option "Add New" makes a complete copy of the current Ipo. This is not visible; only the name in the adjacent button will change. Only Ipos of the same type are displayed in the menu list.
IP:
Give the current Ipo a new and unique name. After the new name is entered, it appears in the list, sorted alphabetically.
Users
If this button is displayed, there is more than one user for the Ipo block. Use the button to make the Ipo "Single User".

Paste from Buffer
All selected channels in the IpoWindow are assigned an IpoCurve from the temporary buffer. The rule is: the sequence in which they are copied to the buffer is the sequence in which they are pasted. A check is made to see if the number of IpoCurves is the same.

Extend mode Direction
The ends of selected IpoCurves continue extending in the direction in which they end.

View Zoom
Move the mouse horizontally or vertically to zoom in or out on the IpoWindow. This is an alternative for CTRL-MMB.

IpoWindow
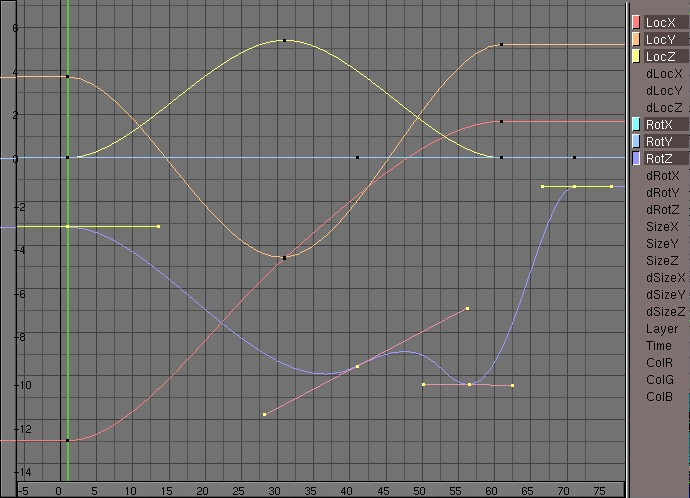
The IpoWindow shows the contents of the Ipo block. Which one depends on the Ipo Type specified in the header. The standard IpoWindow has a grid with the time expressed horizontally in frames and vertical values that depend on the channel. There are 2 sliders at the edge of the IpoWindow. How far the IpoWindow is zoomed in can be seen on the sliders, which can also be used to move the view. The right-hand part of the window shows the available channels.
To make it easier to work with rotation-IpoCurves, they are displayed in degrees (instead of in radials). The vertical scale relation is: 1.0 'Blender unit' = 10 degrees.
In addition to the IpoCurves, the VertexKeys are also drawn here. These are horizontal blue lines; the yellow line visualises the reference Key.

Each channel can be operated with two buttons:
The Mouse
LMB and drag
These are the Gestures. Blender's gesture recognition works in two ways here:
Draw a straight line: start translation mode (Grabber)
Draw a V-shaped line: start scaling mode.
CTRL-LMB
Create a new vertex. These are the rules:
There is no Ipo block (in this window) and one channel is selected: a new IpoBlock is created along with the first IpoCurve with one vertex.
There is already an Ipo block, and a channel is selected without an IpoCurve: a new IpoCurve with one vertex is added
Otherwise a new vertex is simply added to the selected IpoCurve.
This is not possible if multiple IpoCurves are selected or if you are in EditMode.
MMB
Depending on the position within the window:
On the channels; if the window is not high enough to display them completely, the visible part can be shifted vertically.
On the sliders; these can be moved. This only works if you are zoomed in.
The rest of the window; the view is translated.
CTRL-MMB
Zoom in/out on the IpoWindow. You can zoom horizonally or vertically using horizontal and vertical mouse movements.
RMB
Selection works the same here as in the 3DWindow: normally one item is selected. Use SHIFT to add/remove from the selection.
If the IpoWindow is in IpoKey mode, the IpoKeys can be selected.
If at least 1 of the IpoCurves is in EditMode, only its vertices can be selected.
VertexKeys can be selected if they are drawn (horizontal lines)
The IpoCurves can be selected.
The HotKeys
PAGEUP
Select the next IPO Key. If more than one IpoKey is selected, the selection is shifted cyclically.
PAGEDOWN
Select the previous IPO Key. If more than one Object Key is selected, the selection is shifted cyclically.
TAB
All selected IpoCurves go into or out of EditMode. This mode allows you to transform individual vertices.
AKEY
Select All / deselect All. If any item is selected, first everything is deselected. Placing the mouse cursor above the channels, (de)selects all channels where there is a curve.
BKEY
Border select. Draw a rectangle with the LeftMouse; all items that fall within this rectangle are selected. Draw a rectangle with the RightMouse to deselect.
SHIFT-D
Duplicate IPO. All selected vertices or IpoKeys are copied. Then translation mode is started automatically.
GKEY
Translation mode (the Grabber). This works on selected curves, keys or vertices. Alternatives for starting this mode:
RMB and drag.
LMB and draw a straight line.
The following options are available in translation mode:
Limitors:
CTRL increments of 1 frame or vertical unit.
SHIFT-CTRL increments of 0.1 frame or vertical unit.
MMB restricts the current translation to the X or Y axis. Blender calculates which axis to use, based on the already initiated mouse movement. Click MiddleMouse again to restore unlimited translation.
ARROWS:
With these keys the mouse cursor can be moved exactly 1 pixel.
Grabber can be terminated with:
LMB SPACE or ENTER: move to the new position.
RMB or ESC: everything returns to the old position.
IKEY
Insert Key. Vertices can be added to the visible curves in the IpoWindow. A PopupMenu asks you to make a choice:
"Current Frame"; all visible curves get a vertex on the current frame.
"Selected Keys"; (only in IpoKey mode) all selected IpoKeys get vertices for each visible curve, including IpoCurves that are not part of the IPO Key.
JKEY
Join vertices. Selected vertices or IpoKeys can be joined. A PopupMenu asks you to make a choice:
"All Selected"; all selected vertices are replaced by a new one.
"Selected doubles": all selected vertices that are closer to each other than 0.9 frame are joined.
KKEY
IPO Key mode ON/OFF. If the Ipo block is Object Ipo type, the Objects are redrawn with the option DrawKey ON (see the explanation under IpoHeader).
RKEY
Recording
mode. The X and Y movements of the mouse are linked to the height of the IpoCurve. Thus, this works with a maximum of two selected channels or IpoCurves. The old curve is completely deleted; the new one becomes a 'linear' type. You cannot change parts of curves with recording. The scale at which this happens is determined by the view of the IpoWindow. A PopupMenu asks you to make a choice:
"Still"; the current frame is used as the starting point.
"Play anim"; the animation starts, allowing you to see the correlation with other animation systems.
During recording mode, the CTRL must be held down to actually start recording. Press SPACEKEY or ENTER or LeftMouse to stop recording. Use ESCKEY to undo changes.
SKEY
Scaling mode. This works on selected IpoCurves and vertices. The degree of scaling is precisely linked to the mouse movement. Try to move from the (rotation) midpoint with the mouse. In IpoKey mode, you can only scale horizontally. Alternatives for starting scaling mode:
LMB draw a sharp angle; a V-shaped line. The following options are available in scaling mode:
Limitors:
CTRL: in increments of 0.1.
SHIFT-CTRL: in increments of 0.01.
MMB limits scaling to the X or Y axis. Blender calculates which axis to use based on the already initiated mouse movement. Click MiddleMouse again to return to free scaling.
ARROWS These keys allow you to move the mouse cursor exactly 1 pixel.
XKEY Make the horizontal scaling negative, the X-flip.
YKEY Make the vertical scaling negative, the Y-flip.
Terminate size mode with: LMB SPACE or ENTER: to finalize scaling.
RMB or ESC : everything returns to its previous state.
SHIFT-S
Snap Menu.
"Horizontal": The selected Bezier handles are set to horizontal.
"To next": The selected handle or vertex is set to the same (Y) value as the next one.
"To frame": The selected handles or vertices are set to the exact frame values.
"To current frame": The selected handle or vertex is moved to the current frame.
TKEY
If an IpoCurve is selected: "Ipo Type". The type of selected IpoCurves can be changed. A PopupMenu asks you to make a choice:
"Constant": after each vertex of the curve, this value remains constant, and is not interpolated.
"Linear": linear interpolation occurs between the vertices.
"Bezier": the vertices get a handle (i.e. two extra vertices) with which you can indicate the curvature of the interpolation curve.
"Linear": linear interpolation occurs between the Keys. The Key line is displayed as a broken line.
"Cardinal": fluent interpolation occurs between the Keys; this is the default.
"BSpline": extra fluent interpolation occurs between the Keys, four Keys are now involved in the interpolation calculation. Now the positions themselves cannot be displayed precisely, however. The Key line is shown as a broken line.