UV editor and FaceSelect
Introduction
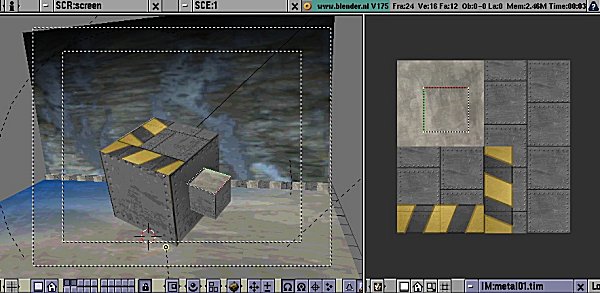
The UV-Editor allows you to map textures directly on the faces of Meshes. Each face can have individual texture coordinates and an individual image assigned to it. You can also combine it with vertex colors to make the texture brighter/darker or give it a colour.
For each face there are two extra features added:
four UV coordinates - These define the way an Image or a Texture is mapped on the face. It are 2D coordinates, that's why it is called UV do distinguish from XYZ coordinates. These coordinates can be used for rendering or for realtime OpenGL display.
a link to an Image - Every face in Blender can have a link to a different Image. The UV coordinates define how this image is mapped to the face. This image then can be rendered or displayed in realtime.
A 3D window has to be in "Face Select" mode to be able to assign Images or change UV coordinates of the active Mesh Object.
Assigning Images to faces
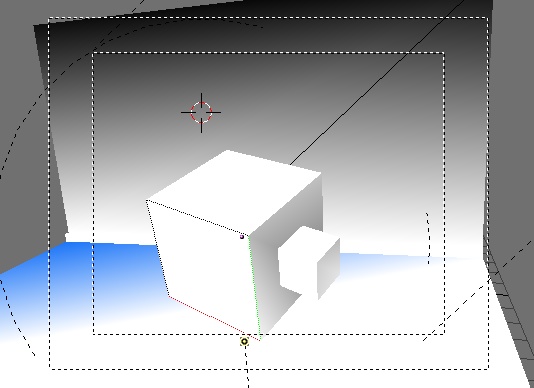
First you add a Mesh Object to your Scene, next is to enter the FaceSelect Mode with F-KEY or by pressing the FaceSelect Button in the 3DWindow header.
Your Mesh will now be drawn Z-buffered, if you enter the Textured draw mode (ALT-Z, also called "potato mode") you will see your Mesh drawn in purple, which indicates that there is currently no Image assigned to these faces. Now press AKEY and all the faces of the Mesh will be selected and drawn as dotted lines.
Then change one Window into the Image Window with SHIFT-F10. Here you can load or browse an Image with the "Load" button. Images have to be in the power of 64 pixels (64x64, 128x64 etc.) to be able to drawn in realtime (note: most 3D cards don't support images larger than 256x256 pixels). However, Blender can render all assigned Images regardless the size.
Loading or browsing an Image in FaceSelect automatically assigns the Image to the selected faces. You can immediately see the this in the 3D window (when in Textured view mode).
Selecting faces
You can select faces with RightMouse or with BorderSelect (BKEY) in the 3D window. If you have problems with selecting the desired faces, you can also enter EditMode and select the vertices you want. After leaving EditMode the faces defined by the selected vertices are selected as well.
Only one face is active. Or with other words: the Image Window only displays the image of the active face. As usual within Blender, only the last selected face is active and this can only be done with a RightMouse click.
Only one face is active. Or with other words: the Image Window only displays the image of the active face. As usual within Blender, only the last selected face is active and this can only be done with a RightMouse click.
Editing UV coordinates
In the ImageWindow you will see a representation of your selected faces as yellow or purple vertices connected with dotted lines. You can use the same techniques here as in the Mesh EditMode, to select, move, rotate, scale etc. With the "Lock" button pressed you will also see a realtime feedback in 3D what you are doing.
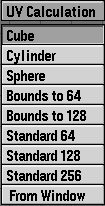
In the 3D window; you can press UKEY in FaceSelect mode to get a menu to calculate UV coordinates for the selected faces.
Cube - Cubical mapping, a number requester asks for a scaling property.
Cylinder, Sphere - Cylindrical/spherical mapping, calculated from the center of the selected faces
Bounds to 64, 128 - UV coordinated are calculated using the projection as displayed in the 3D window. Then scaled to a boundbox of 64 or 128 pixels.
Standard 64, 128, 256 - Each face gets a set of default square UV coordinates.
From Window - UV coordinated are calculated using the projection as displayed in the 3D window.
New options In the ImageWindow: the first button keeps your UV polygons square while editing them, the second clips your UV polys to the size of the Image.
Some tips:
Press RKEY in the 3D window to get a menu that allows rotating the UV coordinates.
Sometimes it is necessary to move image files to a new location at your harddisk. Press NKEY in the ImageWindow to get a "Replace Image name" menu. You can fill in the old directory name, and the new one. Pressing "OK" changes the paths of all images used in Blender using the old directory. (Note: use as new directory the code "//" to indicate the directory where the Blender file is in).
You can also use FaceSelect and VertexPaint (VKEY) simultaneously. Vertex painting then only works at the selected faces. This feature is especially useful to paint faces as if they don't share vertices. Note that the vertex colors are used to modulate the brightness or color of the applied image texture.
Rendering and UV coordinates
Even without an Image assigned to faces, you can render textures utilizing the UV coordinates. For this, use the green "UV" button in the MaterialButtons (F5) menu.
If you want to render the assigned Image texture as well, you will have to press the "TexFace" button in the MaterialButtons. Combine this with the "VertexCol" option to use vertex colors as well.


