 |
|||||||||||||
| News | Tutorials | Games | Downloads | Links | Contact | ||||||||
 |
 |
|
Texture Paintingby Ven0mSevenXPrerequisites: If Blender is brand new to you, there are many video tutorials available for you to learn the basics. Interface Basics Modeling & UV Mapping Introduction: Blender's texture painting tool is extremely useful when trying to blend textures together or creating special effects. I use it a lot for terrain in games, but the applications are limitless. In this tutorial, I will demonstrate how the texture painting tool can be used in two different ways. Enjoy. Grass and Dirt
Step 1A:Unwrap your ground mesh into the UV Image Editor and apply the dirt texture. Like this: 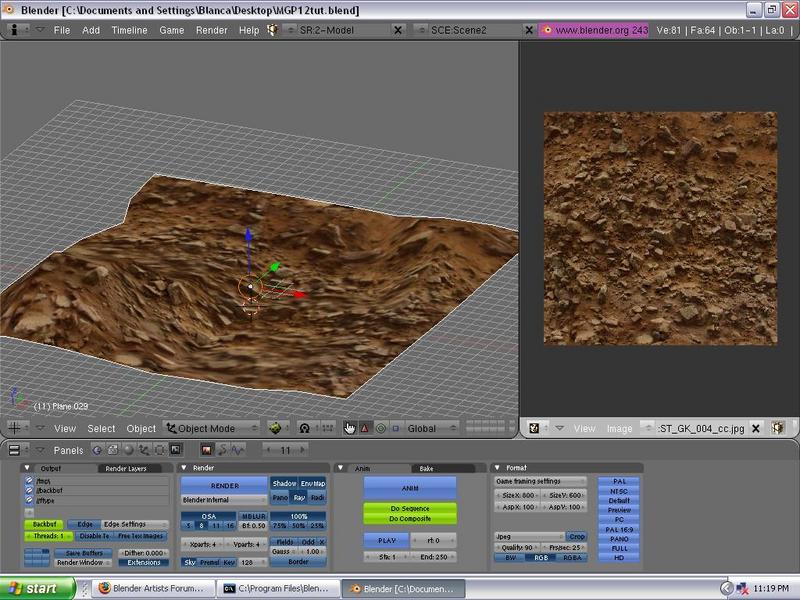
Step2A: Select the areas you want to be painted, so that you can avoid confusion when painting in the UV Image Editor. This way, you won't have to constantly switch back and forth between the UV Image Editor and the 3D Window to see the results of your painting. 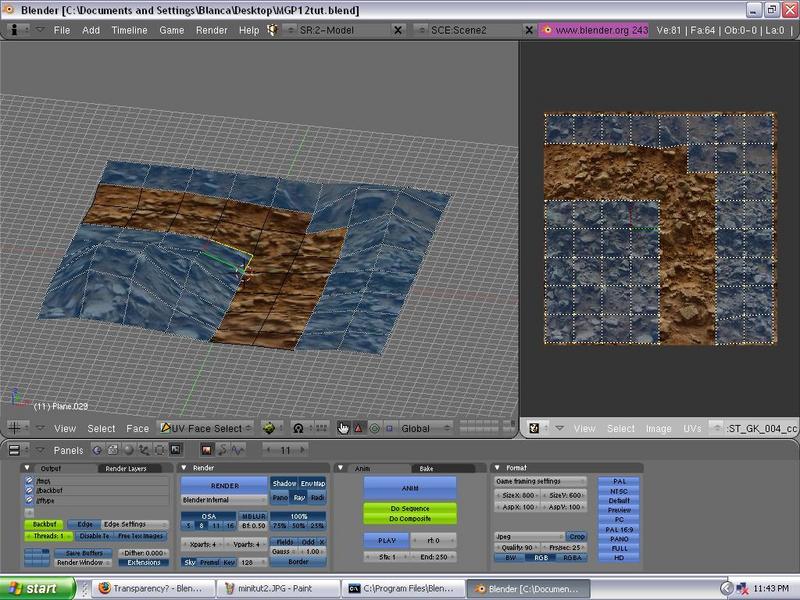
Step3A: Enable texture painting by clicking on the paintbrush in the UV Image Editor. 
Step4A: Open the Paint Tool. You can access the Paint Tool by clicking on "View --> Paint Tool", or pressing the [C Key]. 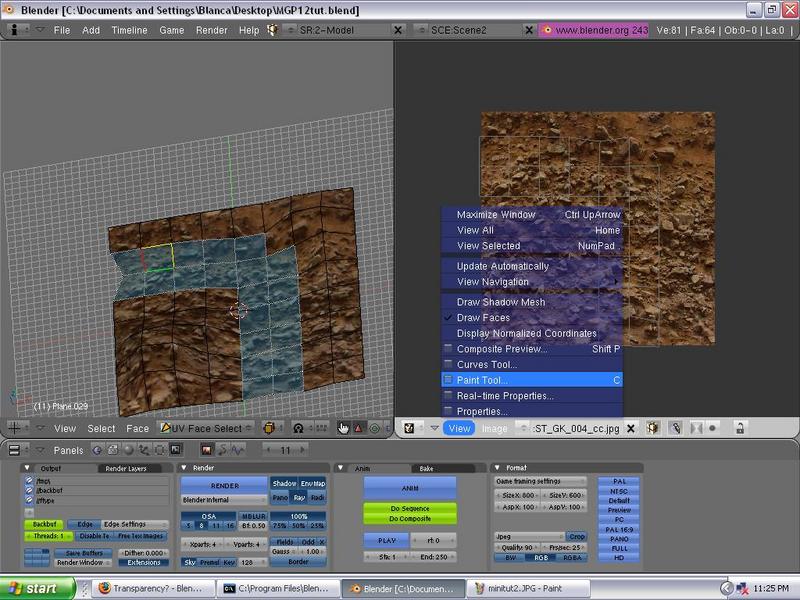
EDIT: Don't mind the selected faces in this screenshot, this was a mistake on my part when uploading the images. Step5A: Click on the Clone button and select a grass texture by clicking on the small box on the bottom left of the panel. 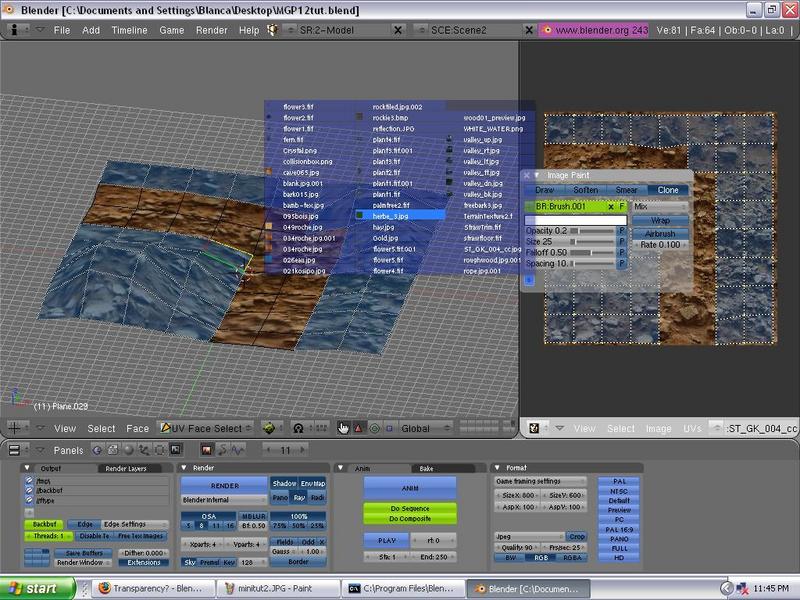
Step6A: Use the Left Mouse Button to paint on the grass texture in the selected areas of the UV window. Step7A: Make sure you save the new texture you made by clicking on "Image --> Save As". 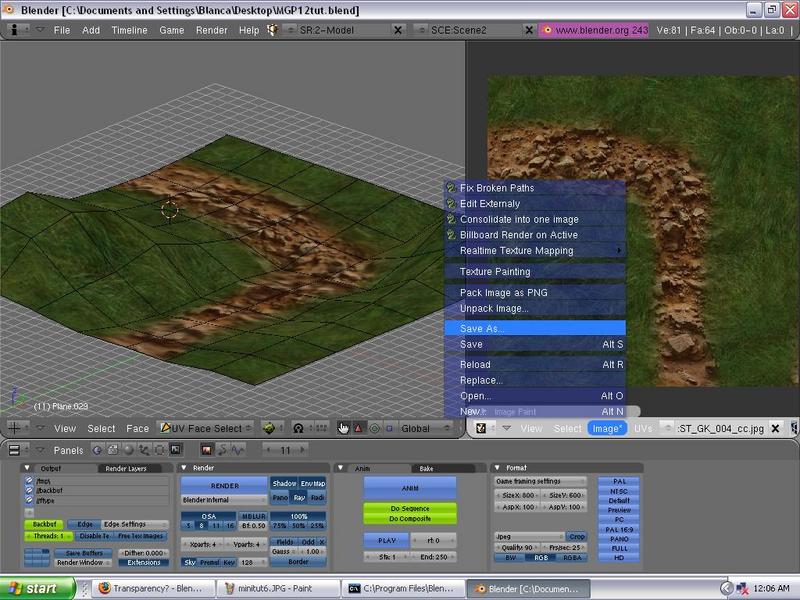
Step8A: Add some decorations, perhaps a few flowers and a rock = ) 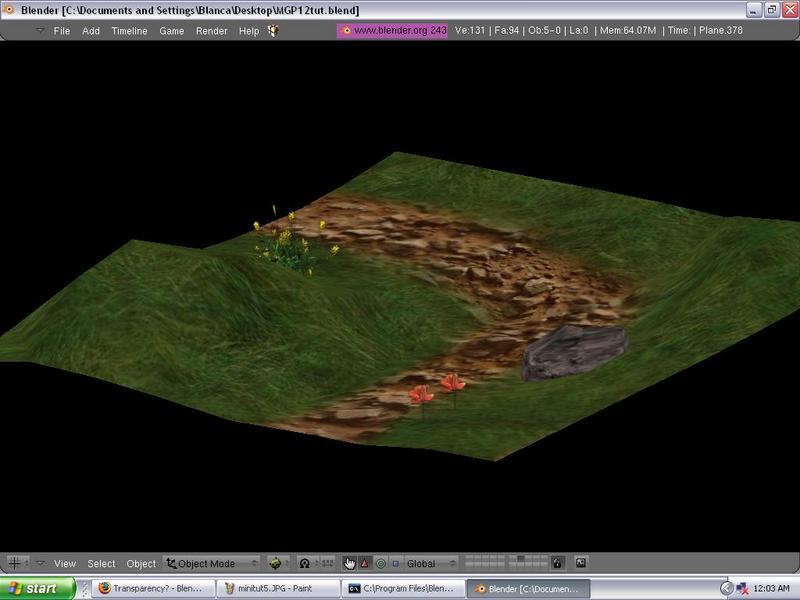
Simple Plasma Effect
Step 1B:Add a plane, and unwrap it in the UV Image Editor. Click on "Image --> New". Make the dimensions 512x512. 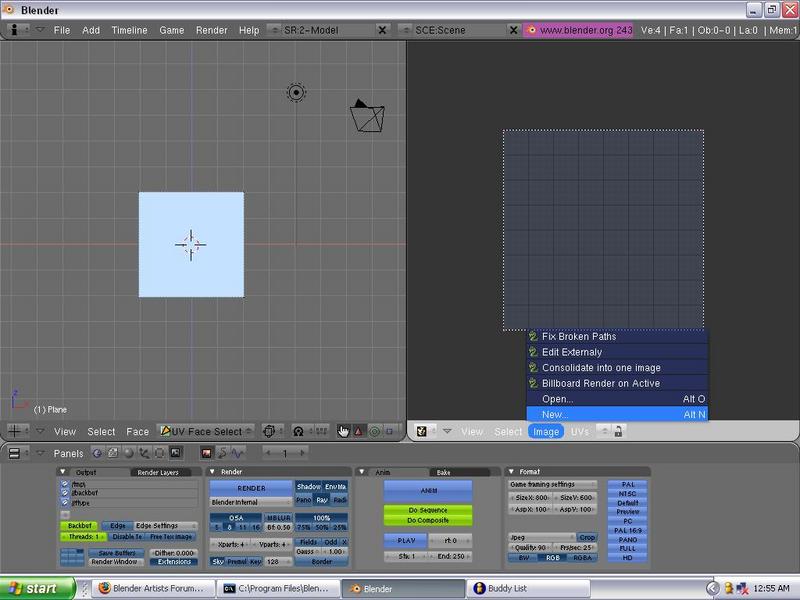
Follow Step 3A Follow Step 4A Step 2B: Select a nice dark color of your choice, and paint an interesting shape. 
Step3B: Make the brush size smaller, and go over your original shape with a lighter color. 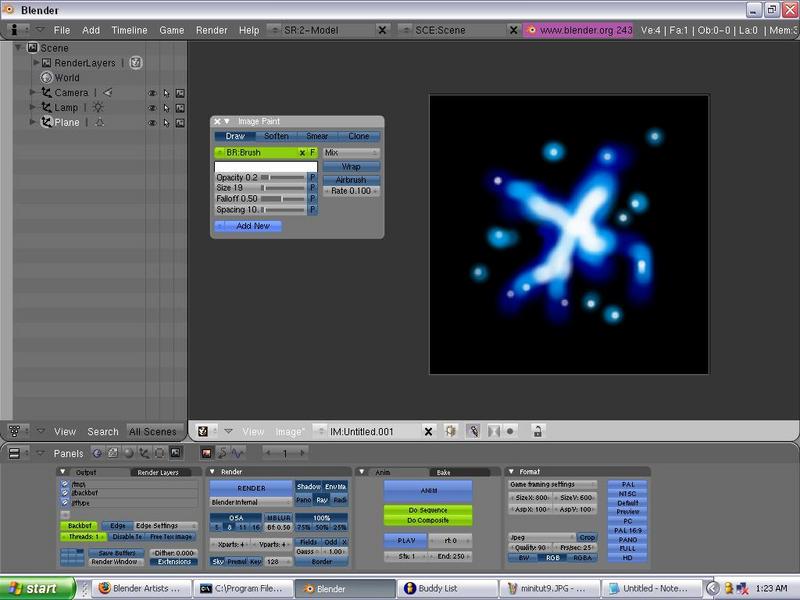
Step4B: Click on the Smear tool, set the Opacity to 0.5 and smear from the center of the shape outward to get a flame like effect. 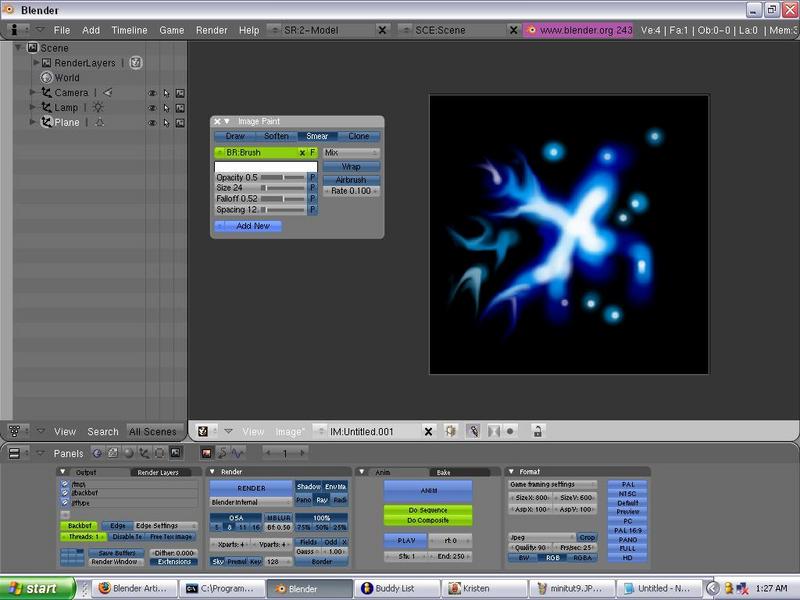
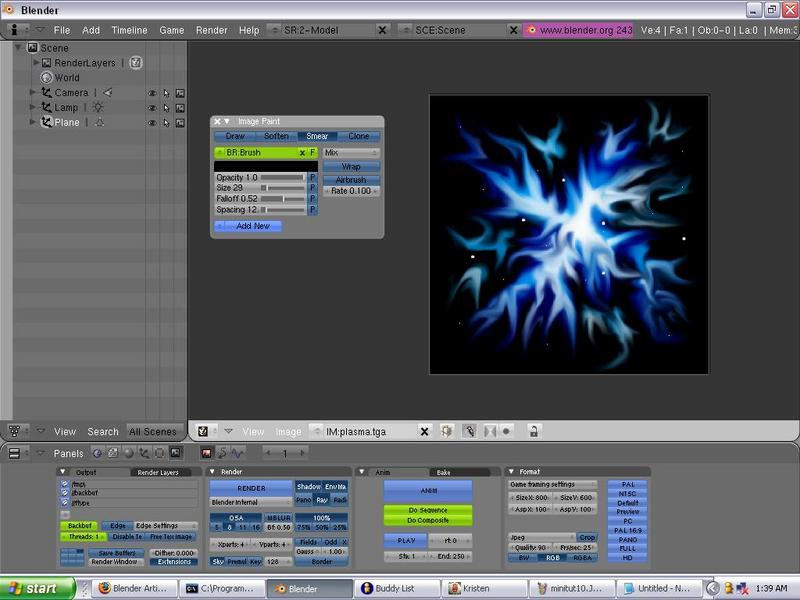
Follow Step 7A Step5B: With the plane selected, press the [F Key] in the 3D Window to switch into Face Select Mode. Now, go to the Edit Buttons Panel, and select Twoside, and Add. 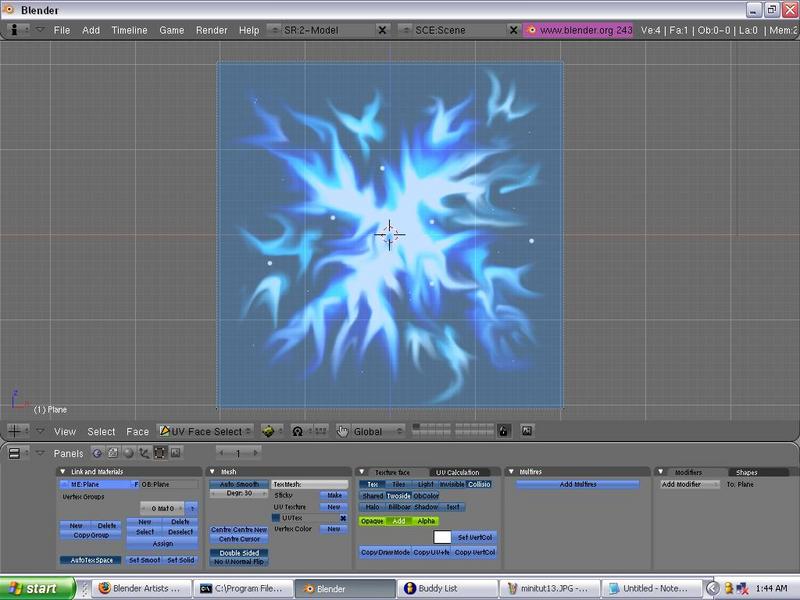
Step6B: Duplicate [Shift-D] this plane and Rotate [R Key] it 90 Degrees so that it is perpendicular to the first plane. 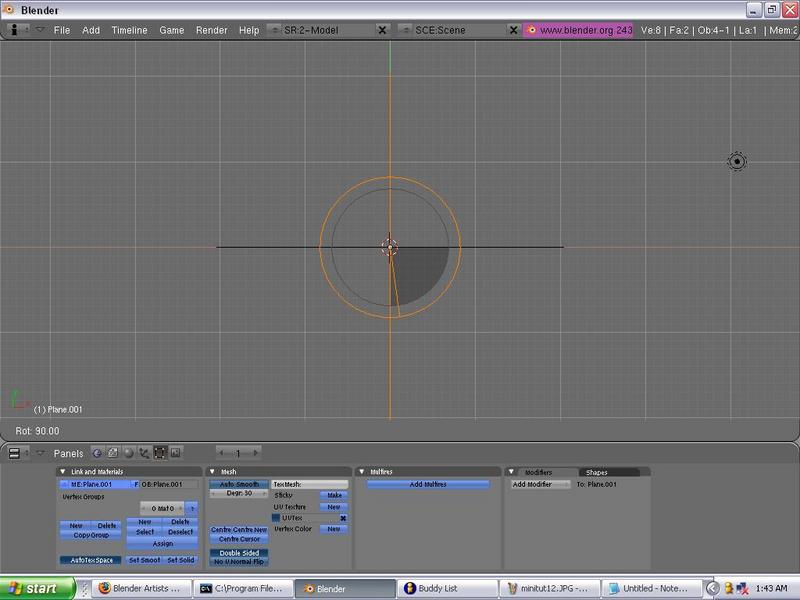
Here's the final result: 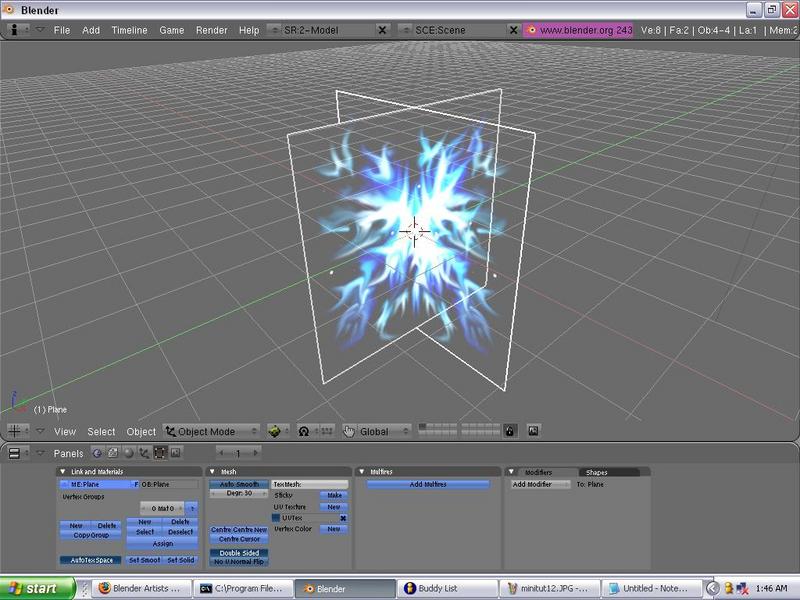
I hope you guys enjoyed this tutorial as much as I enjoyed writing it = ) Happy Blending! 
-Ven0mSevenX Back to the tutorials index... | ||||||||||||||||||


Website design by Tony "blendenzo" DiRienzo. All content is copyrighted by its respective author.