 |
|||||||||||||
| News | Tutorials | Games | Downloads | Links | Contact | ||||||||
 |
 |
|
 |
||||||
Featured Author: -blengine-
|
Tutorials - Adobe Photoshop
Torn Flesh and Zombie Fleshby blengineAll images in this tutorial are free to use. ( Download, zip 586kb) Step 1: This is the base for our skin. You can make something similar by first laying down a flat peach color and then adding darker and slightly different shades with a large spatter brush. It doesn't need to be fancy. We're basically using it for the color. Using the filter Sponge can polish it up at the end, but add a few spatters on top of that to hide the noticeable photoshop sponge pattern. 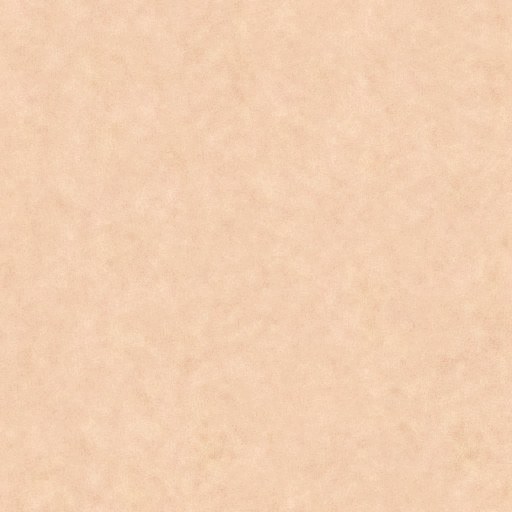 Step 2: This will be our second layer in Photoshop. It's a picture of my greasy forehead that I tiled to fit the canvas size. I changed the blending mode to Linear Burn and then adjusted with the levels. Luckily "Auto Levels" gave me a great result that had the perfect colors, most importantly green. If your result is a bit monotone you can always add a new layer and paint in some green or purple, then set the layer to either Color, or Color Burn, adjusting the FILL as needed. This is the forehead image you'll be using: 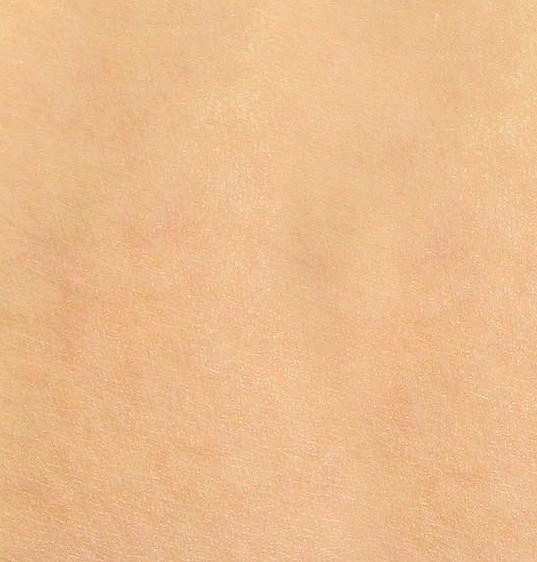 Here is the result after it's added and it's levels adjusted: 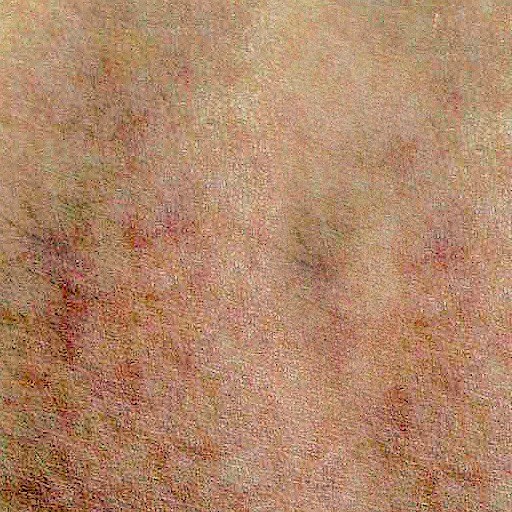 Step 3: Scratch damage. Add a new layer and fill it with white. Choose the paintbrush, color black, and choose a very large spatter brush(increase the size if you have to) and paint a couple spatters, then choose the single hair brush at a very large size and paint a few hairs all over the canvas. There's no real technique here, and you can get good results with practically anything. Here's what I ended up with in a few seconds: 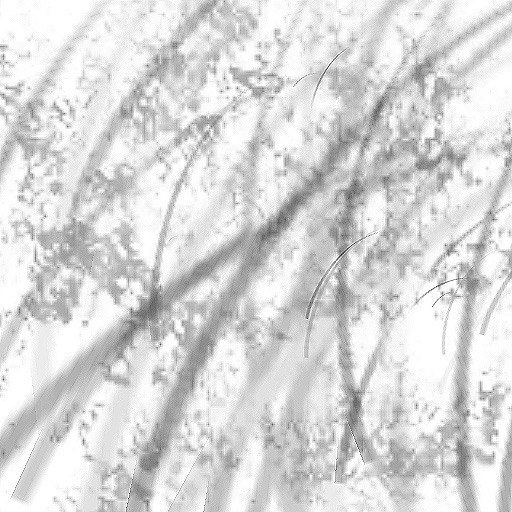 Step 4: Threshold. With that layer still selected go to Image >> Adjust >> Threshold, and change the settings until you have a good looking scratch pattern. You'll know it when you see it. Now in the layers window, select Channel, and at the bottom click on the little circle icon that says "Load channel as selection" when you mouse over it. It will select all the white pixels. Now press delete to get rid of them. Back in layers set the blending mode to Color Burn and the FILL amount to around 40%. Now add the Layer Style "Drop Shadow". Distance at 0, spread at 0, size at 21, opacity at 75, and the blend mode to Color Burn. The result: 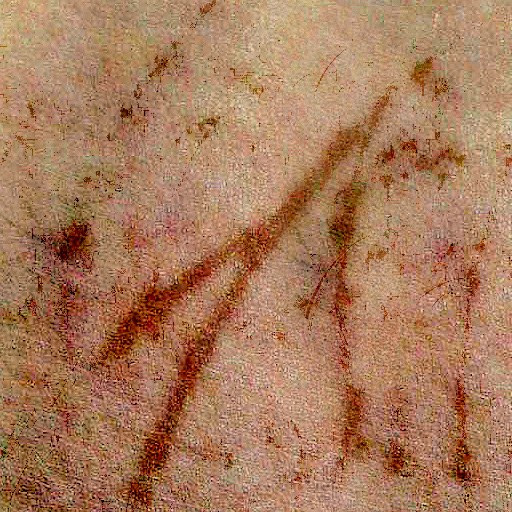 Step 5: Zombified. Save your psd for future project use and then flatten all the layers. Use the Sponge tool set to desaturate and run over a few spots in the image to make the dominate color gray. For the most part you'll want to steer around the scratches, and also leave a hint of peachy flesh. The result:  Here is the PSD file. And here as some rendered results! -Blengine 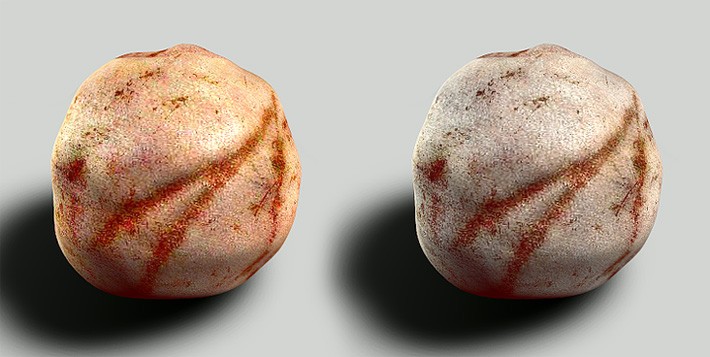 Back to the tutorials index... |
|||||
|
|
||||||
|
||||||
Website design by Tony "blendenzo" DiRienzo. All content © Copyright Tony DiRienzo unless otherwise noted.